Our focus this past year has been on seamlessly integrating our secure file exchange capabilities with the world's most popular operational platforms. We are excited to announce the launch of our SendSafely Zapier App, which allows us to further this goal and keep pace with the ever evolving platform marketplace.
Our Sendsafely Zapier App lets customers connect the SendSafely Dropzone to over 1,000 platforms, with more added every day. The Zapier platform acts as an integration middle-man, facilitating automated connections (Triggers and Actions) between independent applications.
Zapier’s simple to use, point and click interface makes configuring integrations a breeze, even for non-technical users. SendSafely + Zapier allows the integration of encrypted files into virtually any workflow. In this blog post we'll show you how to get started with Zapier and step you through the creation of your first Zap.
What is a Zap?
A Zap is a blueprint for a task you want to automate with Zapier. In words, a Zap looks like this: "When I get a new thing in A, do this other thing in B." The first part is the Trigger and the second part is the Action. For this example, the Zap can be described by saying "When a new file gets uploaded to my SendSafely Dropzone, send me an email with a link to download the files."
Zapier supports hundreds of apps. You can mix and match triggers and actions to automate just about anything. In our example, a file submitted to the Dropzone is the Zapier Trigger and sending an email notification is the Zapier Action. This example is intentionally simple in order to demonstrate how to use the SendSafely Zapier app. A real world example can include much more complex Actions, such as posting file submission notice directly to a support ticket in another system.
Enable your SendSafely Dropzone
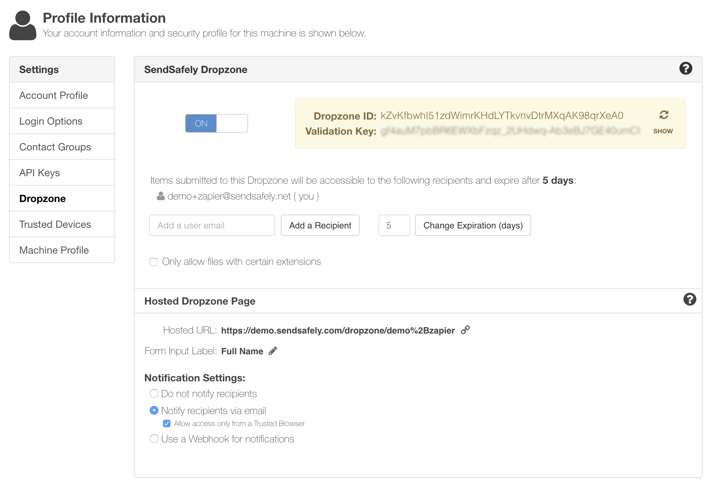
Enable your Dropzone by logging into the SendSafely portal and browsing to the Dropzone section of the Edit Profile screen. Once enabled, you will see your Dropzone ID and Dropzone Key displayed. You will need these two values to configure the Zap.
Create Your Zapier Account and Start Your SendSafely Zap
If you don't already have a Zapier account, you can sign up for a free account here. Once logged in, choose the “Make a Zap!” option and search for the SendSafely App. We will use the SendSafely App for our Trigger.
Create a Trigger
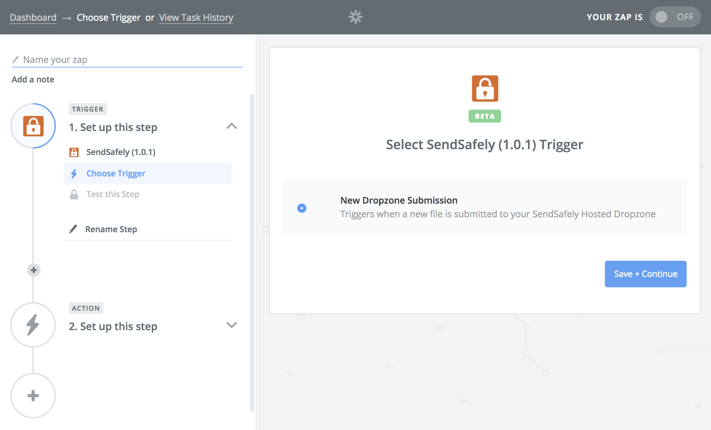
The SendSafely Zapier App exposes a single Trigger method called New Dropzone Submission, which gets invoked every time there is a new submission to your Dropzone. Select this Trigger and click "Save + Continue".
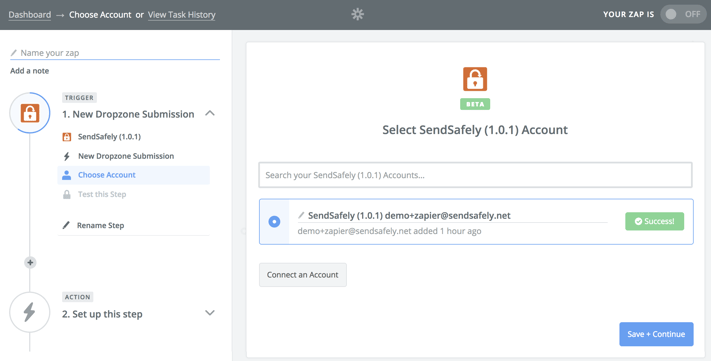
Connect Your SendSafely Account
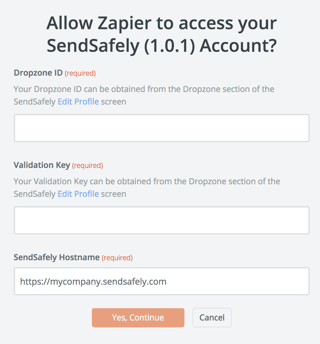
Next, you will need to connect the Zapier App to your Dropzone using the “Connect an Account” option. To connect your SendSafely account to Zapier, you will be prompted to provide your Dropzone Id and Validation Key (both obtained from the SendSafely Edit Profile screen shown above) and the SendSafely Hostname you normally authenticate to (for enterprise users, the SendSafely hostname is typically https://companyname.sendsafely.com. For PRO users, the hostname is https://www.sendsafely.com.)
Once connected, you should see the email address associated with your SendSafely account shown in the description field of the connected account. You can verify the credentials by pressing “Test” which should show “Success” if the credentials are valid. Once the test is successful, click “Save + Continue”.
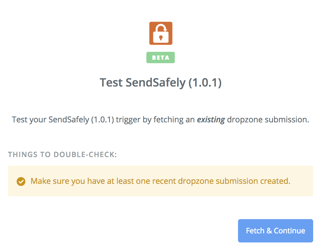
Test your Trigger
Next, we need to test the new trigger. Click “Fetch & Continue” to run the test. If you have previously submitted an item to your Dropzone, the most recent submission will be returned during the test. If you have never submitted an item to your Dropzone, then a system-generated sample will be returned instead.
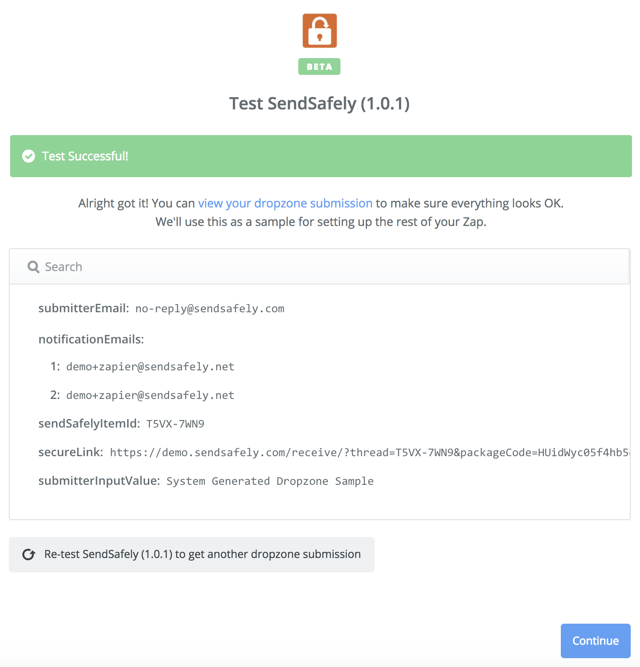
After the test completes, click the “view your drop zone submission” link to view the data returned by the test. The data returned includes the following 5 values:
- SubmitterEmail: The email address provided by the person that uploaded the files
- NotificationEmails: The list of Dropzone Recipients configured for the Dropzone. Dropzone recipients can be managed from the Dropzone section of the SendSafely Edit Profile screen.
- SendSafelyItemId: A unique identifier associated with the file submission
- SecureLink: A link that can be used by any of the Dropzone Recipients to access the uploaded files
- SubmitterInputValue: The text input value provided by the person that uploaded the files.
Add an Action
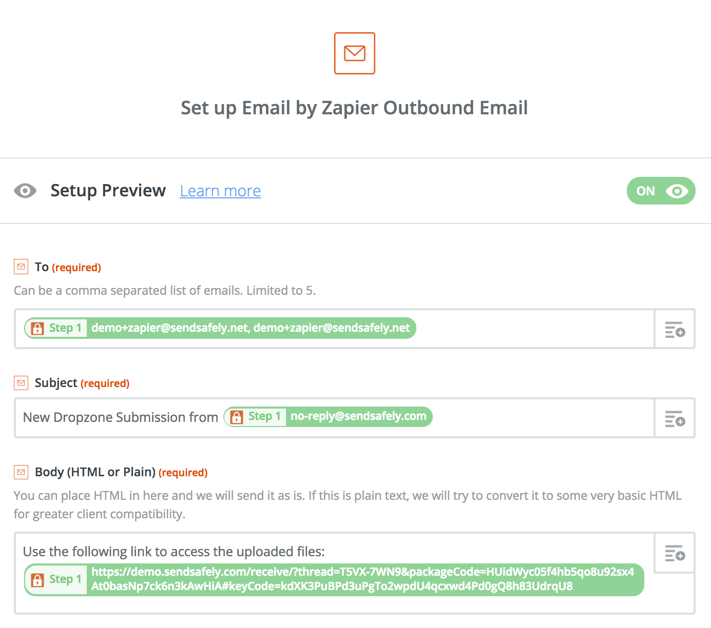
Now that you’ve fetched a Dropzone submission (our Trigger) we are ready to add an Action, which can be invoked by another Zapier app. In this simple example we will use the Email by Zapier app to send an email notification to all Dropzone Recipients each time a new file is uploaded.
To add the Action, press the “+” icon under the SendSafely Trigger, then search for the app “Email by Zapier”. Once selected, choose “Send Outbound email” as the Action and complete the form. Note the following related to the example shown below:
- The “To” field was populated using the Recipient Email Addresses value (notificationEmails) from step above, which comes from the SendSafely App
- The “Subject” includes the Submitter Email Address value (submitterEmail) from step above
- The “Body” includes the SendSafely Link value (secureLink) from step above
Turn on your Zap!
The final step is to turn on your newly created Zap. Toggle the OFF switch when prompted as shown in the screen below. Once enabled, you’ll see a green ON switch and a message indicating that the Zap is running.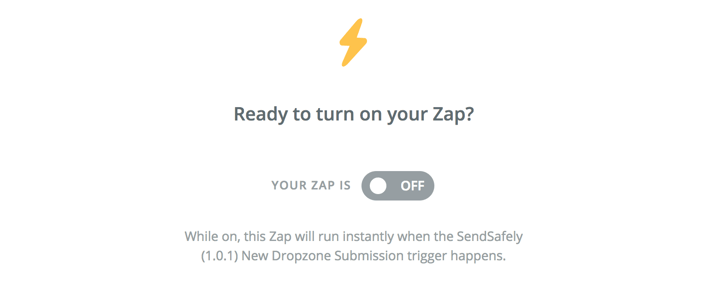
Now that the Zap is running, you should run a quick test to confirm everything is working as expected. To test, go to your Dropzone and submit a new file. If everything works, you should receive an email notification that includes a link to the uploaded files. Congratulations on setting up your first SendSafely Zap!
For questions or inquires about the SendSafely Zapier App or SendSafely Dropzone, please contact our Support Team.
SendSafely: Integrated File Transfer for the Apps you Love
If you are looking for a secure way to transfer files with customers or business partners, our platform might be right for you. Contact us today to request a demo and free trial subscription.