The SendSafely for Chrome browser extension, with Gmail integration is available for all active SendSafely users. You can download and install the extension from the Google Chrome Store.
Installing and Configuring the SendSafely Chrome Extension
You can download and install the extension from the Google Chrome Store. After installation, you will see a SendSafely icon (orange padlock) in the top right corner of the screen.
Before you can use the extension, you will need to launch the pop-up window and provide your SendSafely credentials on the “Configure Settings” tab of the popup window.
If you want to enable Gmail integration, this feature must be explicitly enabled by toggling the on/off switch on the “Configure Settings” tab of the popup window as shown below.

Secure File Transfer using Gmail
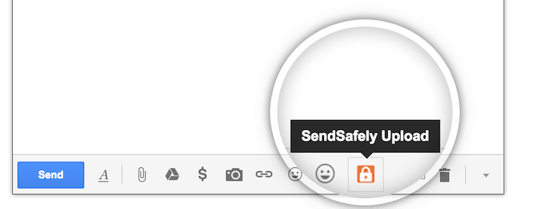
The “Attach with SendSafely” button (located next to the Gmail “Attach File” button) works in much the same way as adding a normal attachment, however files will be encrypted and uploaded to SendSafely instead of attached to the email message.

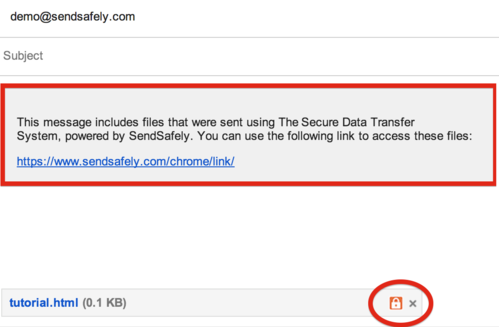
You’ll know the file was attached with SendSafely if you see the orange padlock on the attachment icon (see below). We even add a placeholder to your message where the secure link will go once the message is sent.

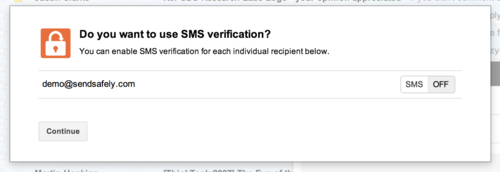
When you hit Send, you’ll be asked to configure SMS verification (optional) for each of your email recipients. Then press Continue to send the email. Sending files with SendSafely has never been easier!

Encrypting an entire Gmail Message (not just attachments)
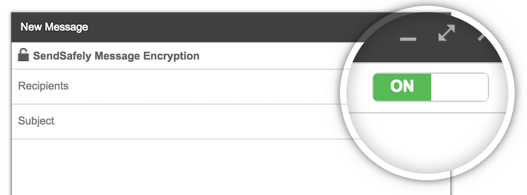
SendSafely's Gmail integration also supports Message Encryption, which protects the entire email message (not just attachments). You can enable this option on a per-message basis by toggling the switch at the top of the Gmail compose screen as show in the image below. When Message Encryption is enabled, attached files will also be sent using SendSafely. You'll typically want to use this option only when the email message body includes something sensitive.

No Gmail? No Problem!
Even if you don’t use Gmail, you can still use our extension to send items using our Chrome popup window. This window is accessible at any time by pressing the SendSafely icon to the right of the address bar. This button is be visible at all times once the extension is installed, and is shown in the screenshot below. You can use the “Send Items” tab to create new SendSafely packages, which includes support for messages and files.

For more information on how to install and configure the plugin, and for other common issues, please consult the following articles in our Online Help Center: