 In a previous blog post, we reviewed the basics of connecting the SendSafely Dropzone to Zapier using a simple action (sending an email) for each Dropzone submission. If you are not already familiar with SendSafely's Zapier app, we strongly encourage you to read it before continuing on.
In this follow up post, we present a more complex Zap that connects the Dropzone to Slack. We will be adding a Zapier Action that sends a message to a specific Slack Channel every time a new item gets submitted to the Dropzone.
Step 1 - Submit a Sample Request to your Dropzone
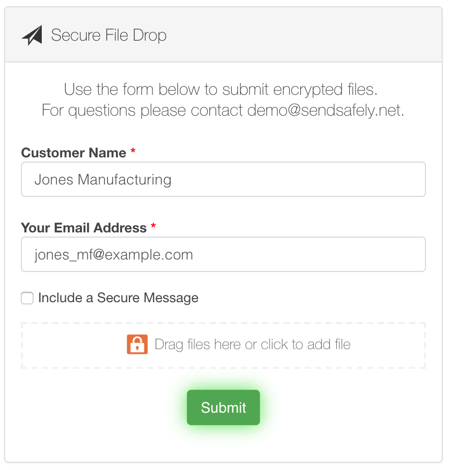
Before you get started with the Zapier app, it's always a good idea to submit a sample request to your Dropzone so that Zapier can fetch the sample when you are configuring the Zap. Note that in the example below, we've customized the Hosted Dropzone Form Input Label to use "Customer Name" instead of the default value of "Full Name" (this can be customized from the Dropzone section of the Edit Profile page).
Step 2 - Create a new Zap with SendSafely as the Trigger
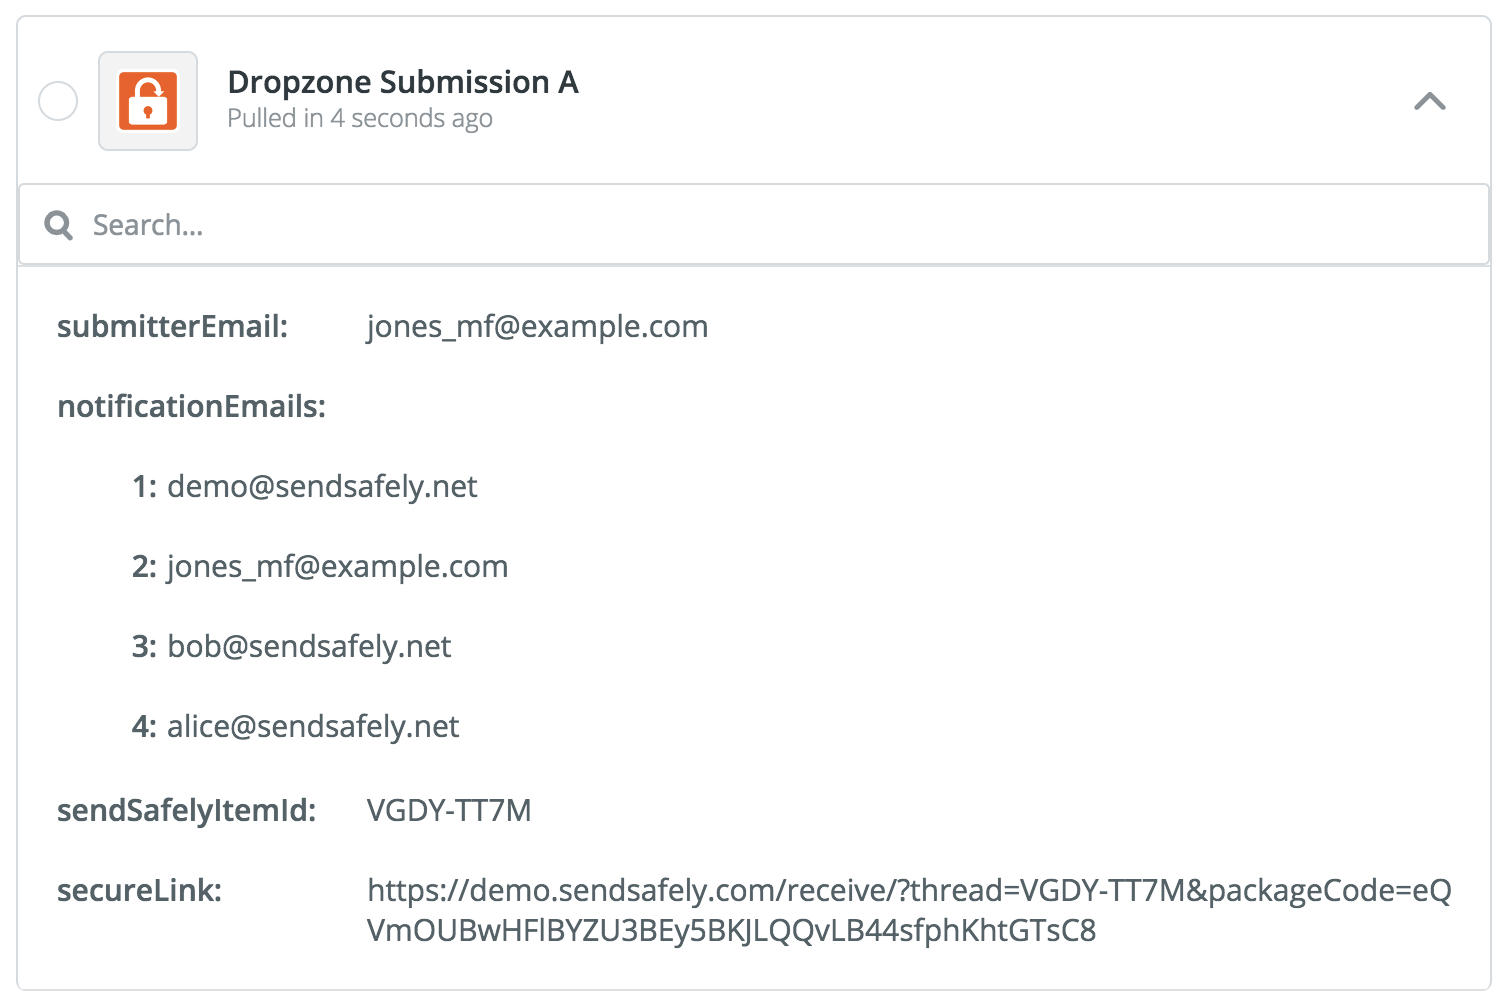
Next, log into Zapier and create a new Zap using the SendSafely Dropzone Trigger, as outlined in our previous Zapier blog post here. When you test the Trigger, click the “View your Dropzone Submission” link to view the sample obtained by Zapier.
If you wish to re-use the existing Zap from this earlier exercise, make sure you run an updated test of the SendSafely Zapier app to retrieve a valid Dropzone Submission sample for use with Slack. To do this, go to “Test this Step” and press the “Re-test SendSafely” button.
Add An Action - Slack: Send Channel Message
Now that your SendSafely Trigger is configured, the next step is to link an Action to the Zap. First, you'll need to add the Slack App by pressing the “+” icon under the SendSafely Trigger, then search for Slack.
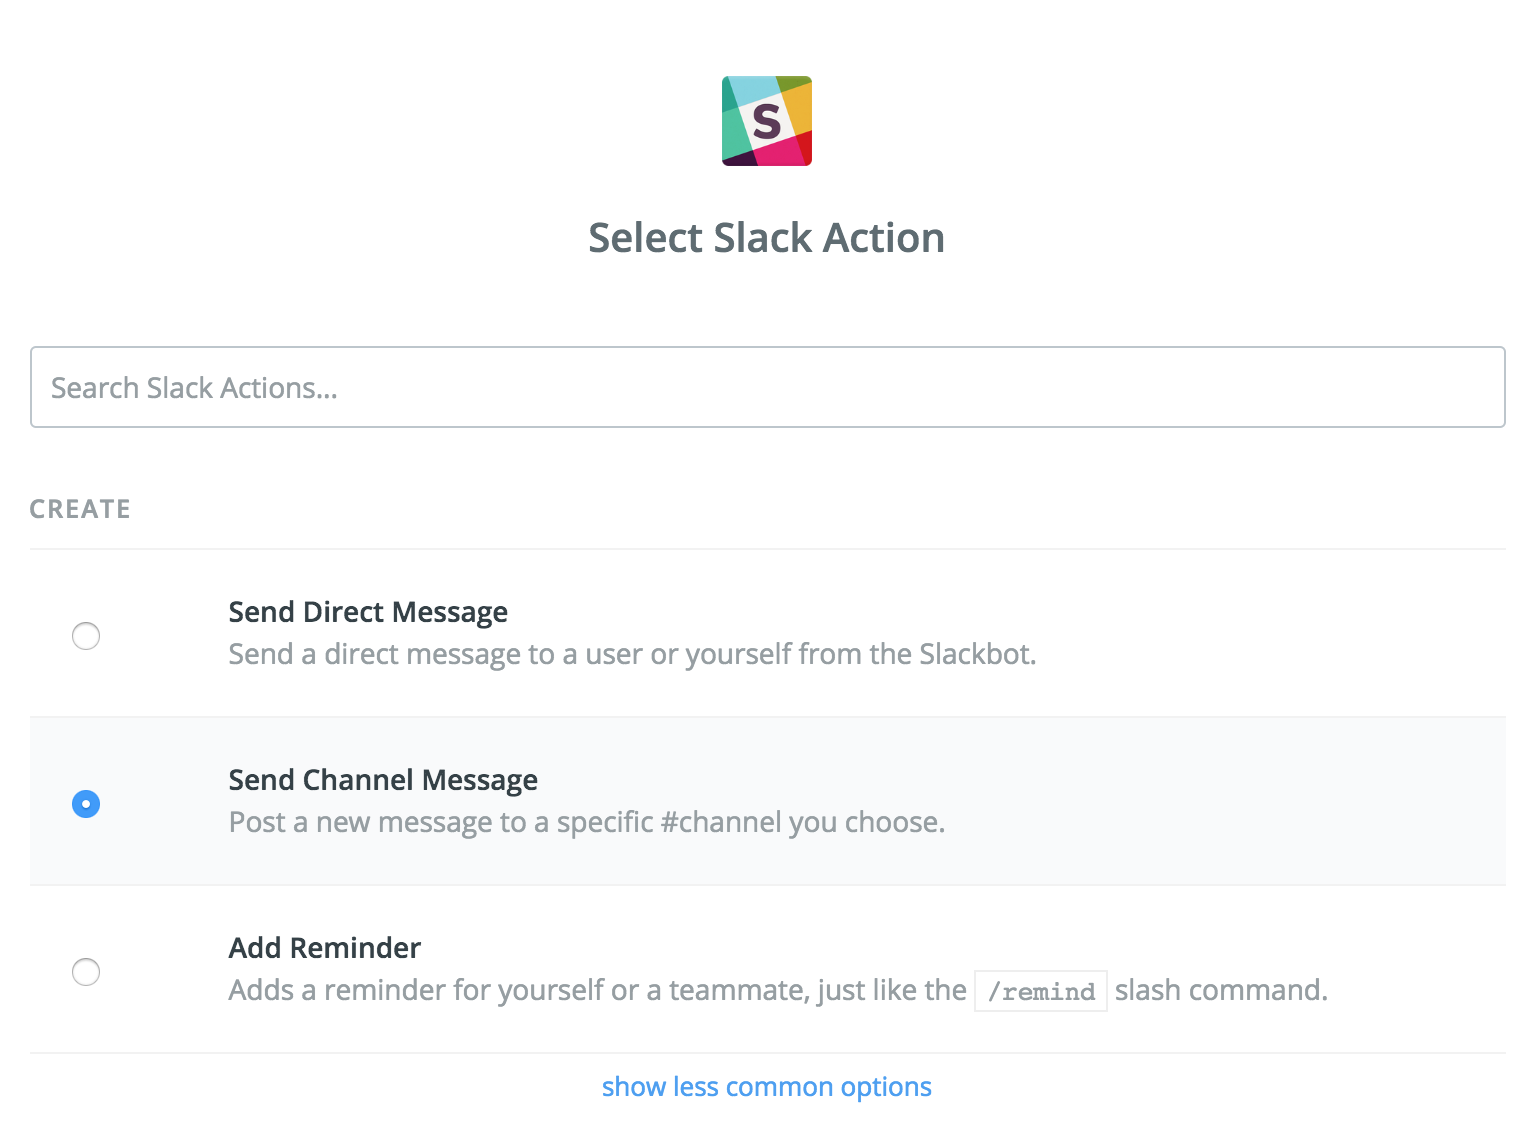
Note that the Slack Zapier App provides several other Actions to chose from as well, such as sending a Direct Message or a Private Channel Message. From the available Slack Actions, choose Send Channel Message, then follow the prompts to connect your Slack account.
Next, you will be prompted to set up your Slack Channel Message
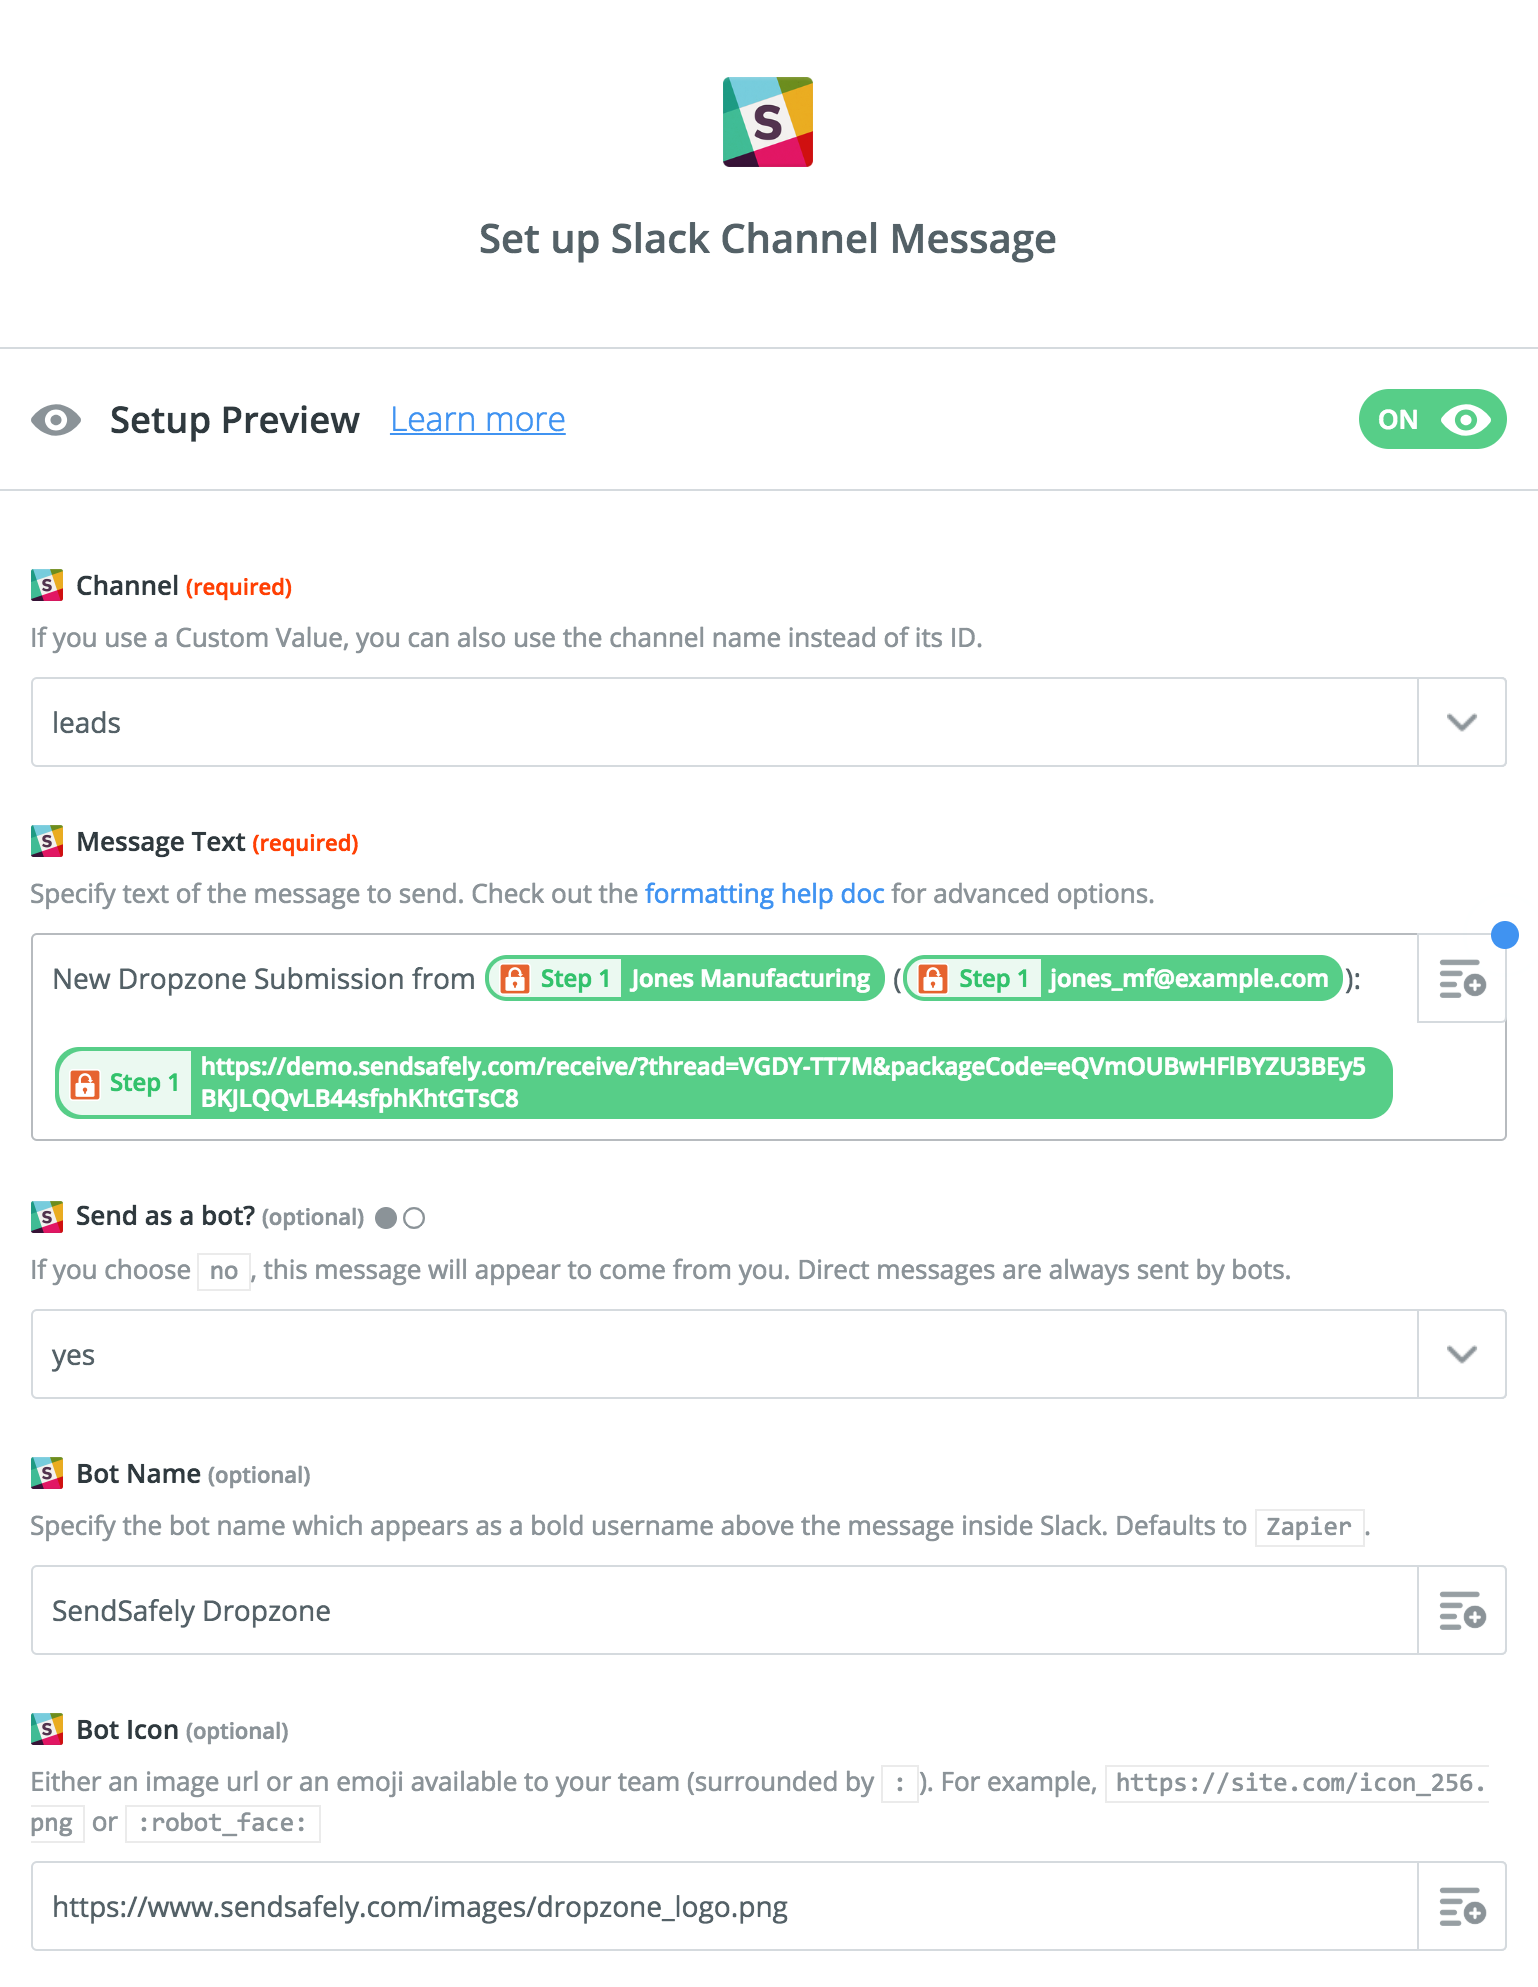
In the screen above, note the following configuration options:
- The Channel field is where you specify the Slack Channel for the notification to be posted. In this example, we chose the channel named "leads".
- The Message Text field is where you format the message text to be posted. The company name, email address, and secure link for the Dropzone item (from Step 1) are all available as placeholders within the message. Click the icon in the top right corner of the text box to see the full list of available placeholders from previous steps in the Zap.
- The Send as Bot, Bot Name, and Bot Icon options let you configure who the message will appear from when posted to the Slack channel.
Once the message is configured, the final step is to test the Action to make sure the Slack Channel gets updated with a notification message. If the test succeeds, you will see an update posted to your Slack Channel as shown below.
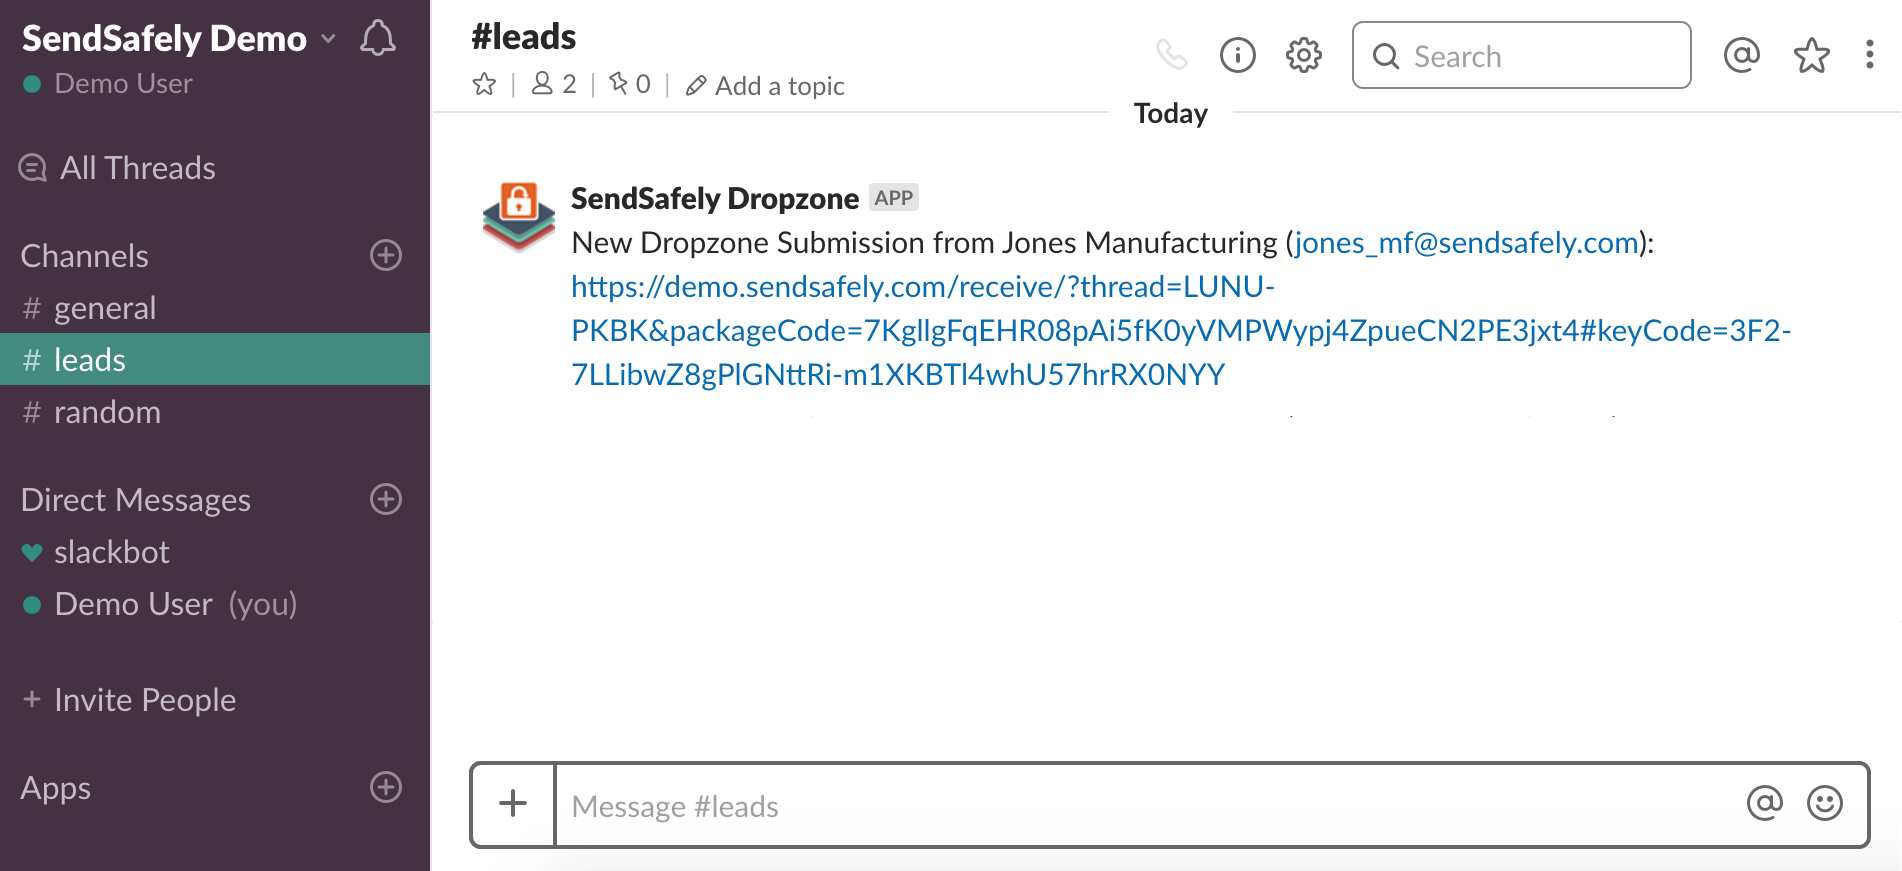
Keep in mind that while any Slack user in the Channel can view the message and the secure link, only authorized SendSafely users (i.e those configured as Dropzone recipients) will be able to authenticate to SendSafely and download and decrypt the file contents.
Congratulations! Your SendSafely Dropzone Slack integration should now be working. Remember to turn on your Zap as the last step once your configuration is complete. For questions or inquires about the SendSafely Zapier App or SendSafely Dropzone, please contact our Support Team.
SendSafely: Integrated File Transfer for the Apps you Love
If you are looking for a secure way to transfer files with customers or business partners, our platform might be right for you. Contact us today to request a demo and free trial subscription.